“如何在Linux(CentOS)下重置MySQL根(Root)密码”的版本间的差异
来自YTYZX有图有真相的百科
| 第7行: | 第7行: | ||
[[File:MySQLRoot3.png]] | [[File:MySQLRoot3.png]] | ||
4.输入“mysqld_safe --skip-grant-tables &”命令以无密码方式进入MySQL安全模式。 | 4.输入“mysqld_safe --skip-grant-tables &”命令以无密码方式进入MySQL安全模式。 | ||
| + | 备注:在CentOS7及MySQL5.7则需使用以下命令。 | ||
| + | 1. systemctl stop mysqld | ||
| + | 2. mysql -uroot -p | ||
| + | Enter password: | ||
| + | ERROR 2002 (HY000): Can't connect to local MySQL server through socket '/var/lib/mysql/mysql.sock' (2) | ||
| + | 3. systemctl set-environment MYSQLD_OPTS="--skip-grant-tables" | ||
| + | 4. systemctl start mysqld | ||
| + | 5. mysql -uroot | ||
[[File:MySQLRoot4.png]] | [[File:MySQLRoot4.png]] | ||
5.输入“mysql -u root”并按回车键即可。 | 5.输入“mysql -u root”并按回车键即可。 | ||
2017年11月9日 (四) 10:45的版本
本例中以CentOS6.6下修改MySQL5.1.73举例说明。
1.首先输入“service mysqld status”查看当前mysql服务状态,下图显示正在mysqld服务正在运行中。
2.输入“killall -TERM mysqld”命令停止所有的mysqld进程。
3.输入“service mysqld stop”命令停止mysqld服务。
4.输入“mysqld_safe  --skip-grant-tables &”命令以无密码方式进入MySQL安全模式。
   备注:在CentOS7及MySQL5.7则需使用以下命令。
             1. systemctl stop mysqld
             2. mysql -uroot -p
                 Enter password:
                 ERROR 2002 (HY000): Can't connect to local MySQL server through socket '/var/lib/mysql/mysql.sock' (2)
             3. systemctl set-environment MYSQLD_OPTS="--skip-grant-tables"
             4. systemctl start mysqld
             5. mysql -uroot
5.输入“mysql -u root”并按回车键即可。
6.输入“use mysql;”挂载数据库。
   注意:请勿忘记在最后输入分号(;)。
7.输入"update user set password=password("New9ssw0rd") where user='root';"将Root密码修改为New9ssw0rd。
8.输入"flush privileges;"更新权限。
9.输入“quit”并按回车键退出。
   注意:此处不需输入分号。
10.输入"service mysqld restart"重启mysqld服务。
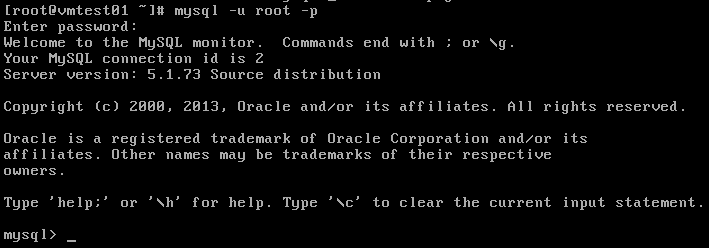
11.输入“mysql -u root -p”并按回车键提示输入密码。
12.输入新密码New9ssw0rd并按回车键,提示已经成功登录。


