“如何设置从U盘启动安装Linux”的版本间的差异
来自YTYZX有图有真相的百科
| (未显示3个用户的4个中间版本) | |||
| 第1行: | 第1行: | ||
| − | 本例中设置从优盘(USB设备)启动并安装Linux系统。 | + | 本例中设置从优盘(USB设备)启动并安装Linux系统 ,亦可使用Rufus(官方网站:https://rufus.akeo.ie/ )制作可启动U盘 。 |
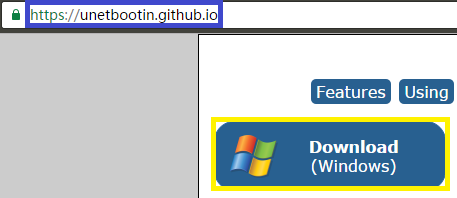
1.请下载USB启动盘制作工具,本例中使用UNetbootin。可直接点击https://unetbootin.github.io 并下载。 | 1.请下载USB启动盘制作工具,本例中使用UNetbootin。可直接点击https://unetbootin.github.io 并下载。 | ||
[[File:LinuxInstallation1.png]] | [[File:LinuxInstallation1.png]] | ||
| 第6行: | 第6行: | ||
3.本例中使用ISO镜像制作,故点击“光盘镜像(I)”前面的选择框,并点击下图蓝色框,选择硬盘内正确的ISO文件。 | 3.本例中使用ISO镜像制作,故点击“光盘镜像(I)”前面的选择框,并点击下图蓝色框,选择硬盘内正确的ISO文件。 | ||
[[File:LinuxInstallation3.png]] | [[File:LinuxInstallation3.png]] | ||
| + | 4.选择ISO文件画面如下。 | ||
| + | [[File:LinuxInstallation4.png]] | ||
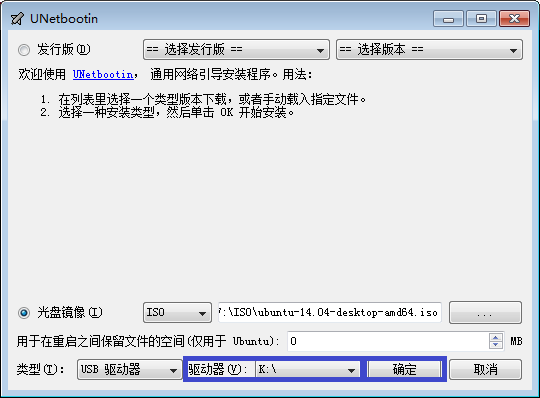
| + | 5.选择正确的盘符(本例中为K盘),确认无误后点击“确定”按钮。 | ||
| + | [[File:LinuxInstallation5.png]] | ||
| + | 6.因本例中使用的U盘已为启动盘,故出现如下错误,确定不需要保存文件之后点击“Yes to All”按钮。 | ||
| + | 错误: 文件K:/.disk/archive.trace已经存在。单击'Yes to All'进行覆盖并且不再提示,‘Yes’覆盖单个文件,而'No'保留你现在的版本。 | ||
| + | 如果不能确定,单机'Yes to All'。 | ||
| + | [[File:LinuxInstallation6.png]] | ||
| + | 7.系统开始从ISO文件下载及拷贝文件。 | ||
| + | [[File:LinuxInstallation7.png]] | ||
| + | 8.文件复制完毕,开始安装Bootloader。 | ||
| + | [[File:LinuxInstallation8.png]] | ||
| + | 9.点击“退出”按钮即可完成启动盘制作过程。 | ||
| + | [[File:LinuxInstallation9.png]] | ||
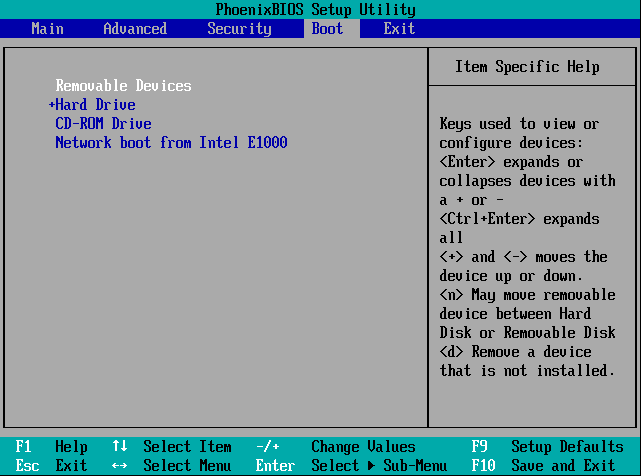
| + | 10.将需要安装Linux系统的主机BIOS设置为从U盘启动(不同电脑BIOS设置不尽相同),并正确连接U盘到主机,保存BISO设置并重新启动。 | ||
| + | [[File:BIOSFlash.png]] | ||
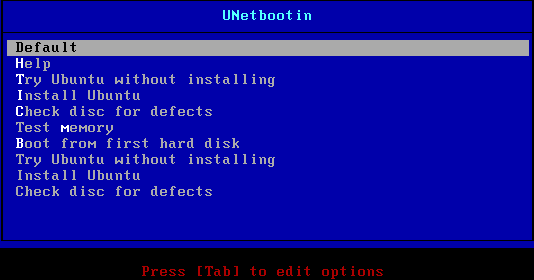
| + | 11.在UNetboot的启动窗口根据您的需求进行选择。 | ||
| + | [[File:LinuxInstallation10.png]] | ||
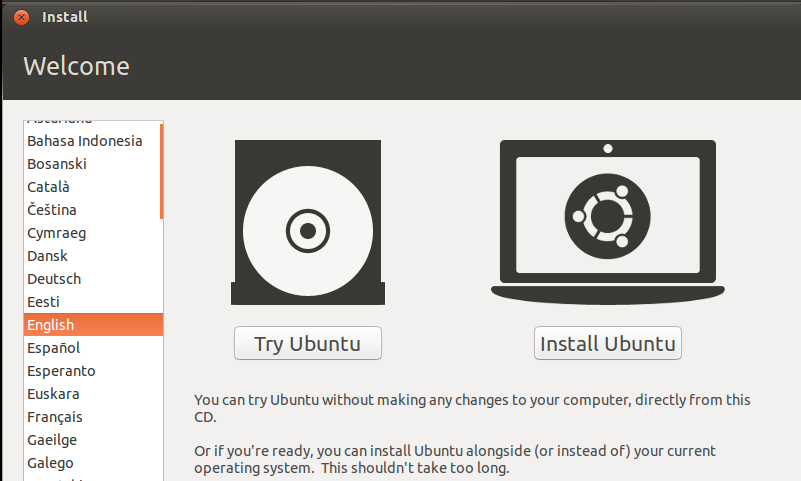
| + | 12.开始安装系统即可。 | ||
| + | [[File:LinuxInstallation11.png]] | ||
| + | |||
| + | == 故障排除 == | ||
| + | |||
| + | 13.如出现如下错误,将U盘拔除并重新插入,等U盘驱动加载完毕后即可。 | ||
| + | 错误内容: [!!]Detect and mount CD-ROM | ||
| + | Your installation CD-ROM couldn't be mounted. This probably means that the CD-ROM was not in the drive. If so you can insert it and try again. | ||
| + | Try again ot mount the CD-ROM <Yes> <No> | ||
| + | [[File:LinuxInstallation12.png]] | ||
2018年7月12日 (四) 19:39的最新版本
本例中设置从优盘(USB设备)启动并安装Linux系统,亦可使用Rufus(官方网站:https://rufus.akeo.ie/ )制作可启动U盘。
1.请下载USB启动盘制作工具,本例中使用UNetbootin。可直接点击https://unetbootin.github.io 并下载。
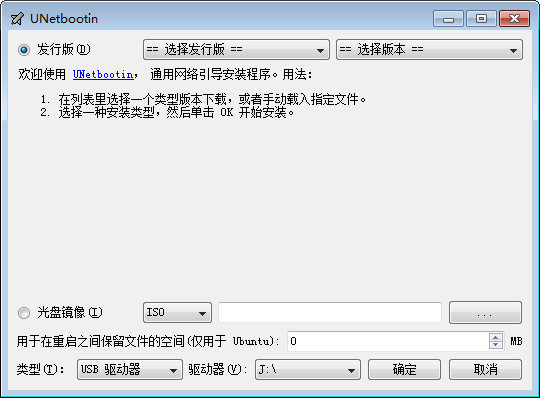
2.下载完毕后直接点击文件并运行(无需安装),启动画面如下。
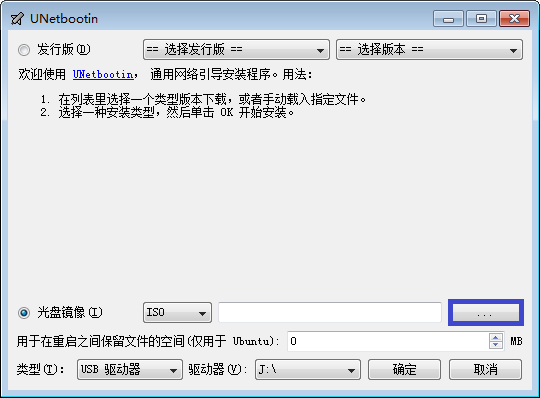
3.本例中使用ISO镜像制作,故点击“光盘镜像(I)”前面的选择框,并点击下图蓝色框,选择硬盘内正确的ISO文件。
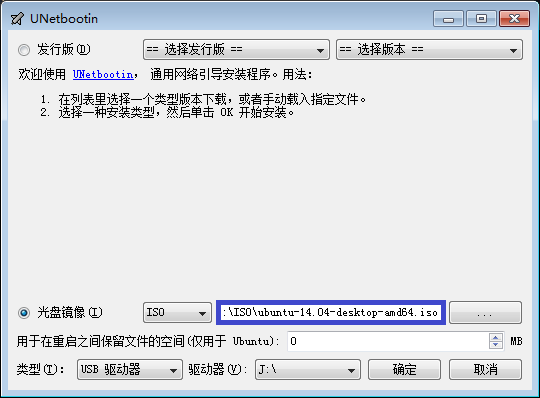
4.选择ISO文件画面如下。
5.选择正确的盘符(本例中为K盘),确认无误后点击“确定”按钮。
6.因本例中使用的U盘已为启动盘,故出现如下错误,确定不需要保存文件之后点击“Yes to All”按钮。
   错误: 文件K:/.disk/archive.trace已经存在。单击'Yes to All'进行覆盖并且不再提示,‘Yes’覆盖单个文件,而'No'保留你现在的版本。
              如果不能确定,单机'Yes to All'。
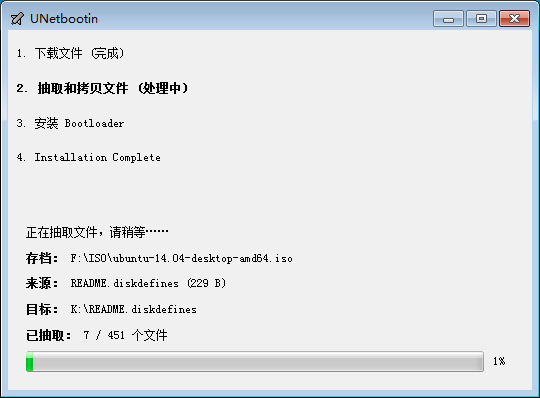
7.系统开始从ISO文件下载及拷贝文件。
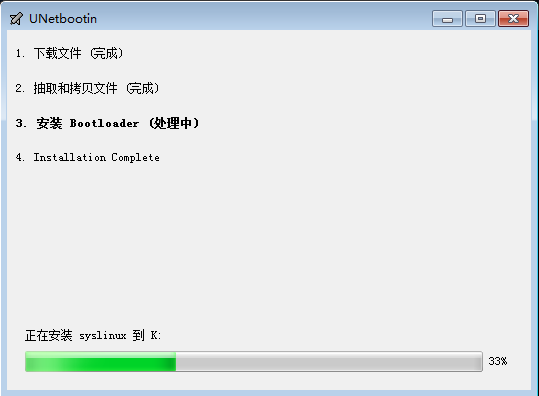
8.文件复制完毕,开始安装Bootloader。
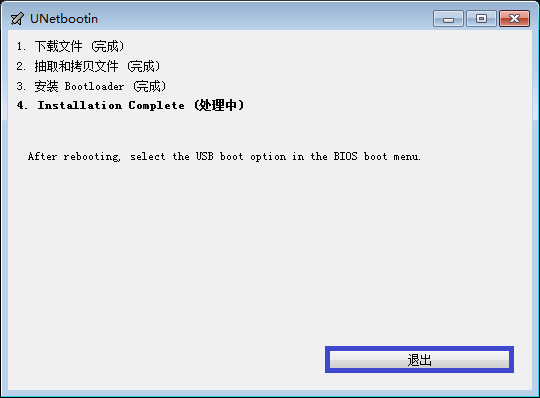
9.点击“退出”按钮即可完成启动盘制作过程。
10.将需要安装Linux系统的主机BIOS设置为从U盘启动(不同电脑BIOS设置不尽相同),并正确连接U盘到主机,保存BISO设置并重新启动。
11.在UNetboot的启动窗口根据您的需求进行选择。
12.开始安装系统即可。
故障排除
13.如出现如下错误,将U盘拔除并重新插入,等U盘驱动加载完毕后即可。
    错误内容:  [!!]Detect and mount CD-ROM
                    Your installation CD-ROM couldn't be mounted. This probably means that the CD-ROM was not in the drive. If so you can insert it and try again.
                    Try again ot mount the CD-ROM       <Yes>             <No>
